Baby Carrier Wrap Step by Step guide - Keababies Wrap Instructions
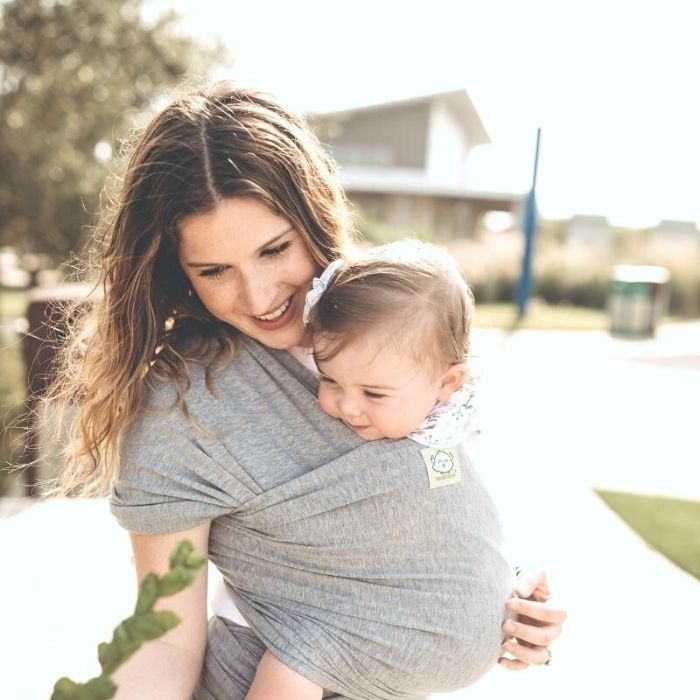
There are many benefits for Keaparents who want to wear their baby in a wrap carrier. The first few months postpartum, also known as “the fourth tr...There are many benefits for Keaparents who want to wear their baby in a wrap carrier. The first few months postpartum, also known as “the fourth trimester,” is a time for babies to adjust to the outside world. This can be overwhelming for infants who have been accustomed to being close to their mommies during their nine months in the womb! Babywearing is an easy way to help babies adjust to the big world around them while remaining close to their KeaMommies and KeaDaddies. And the amazing part is, the Keababies Wrap Carrier is convenient and easy to use! It takes some practice to get comfortable wrapping your baby, but if you follow these simple instructions, you will be successful in no time.
When wearing your baby, the first thing you want to practice is how to tie the actual wrap on your body. Do this a few times before actually placing your baby inside, so you can adjust the wrap to fit snugly and comfortably.
How To Do A Basic Tie (for babies 3+ months old with head and neck control)
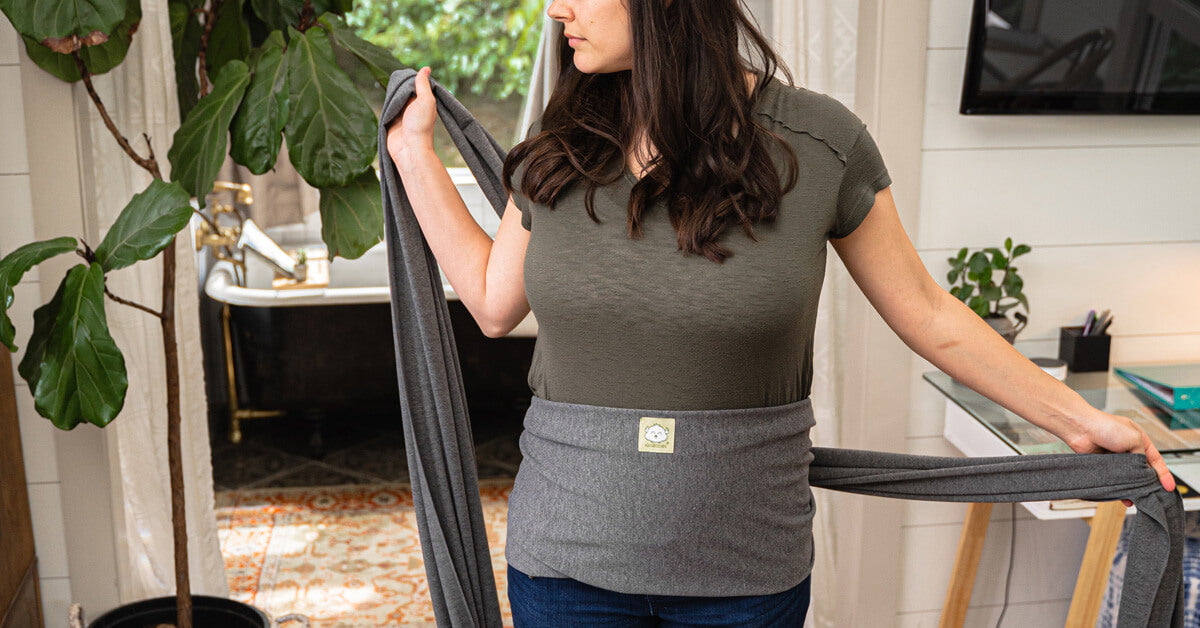
1. Find the middle of the wrap by locating the Keababies logo. Place the logo flat against your stomach, wrapping both ends of the wrap around your waist to your back.
2. Form an “X” pattern by crisscrossing the ends of the wrap behind your back, and then pull the ends of the wrap-up and over your shoulders. Make sure the ends stay as flat as possible – avoid too many twists in the fabric. This can make tying the wrap uncomfortable.
3. With both ends of the wrap now in front of you, take each end and tuck it under the Keababies logo that is against your stomach. Criss-cross them again, and pull around your waist toward your back.
4. The final step is to double knot the wrap. You can do a little trial-and-error to figure out which tie position feels right to you. You can either knot it behind you, on your side, or crisscross the wrap behind your back at waist level, bringing both ends back to the front and double knotting in front of your waist. 
How To Do A Tie For Newborn Hug Hold (for babies 0-3 months old)
-
Find the middle of the wrap by locating the Keababies logo. Instead of placing the logo flat against your stomach, fold the wrap in half before you wrap it around toward your back. You do not need to fold the entire wrap in half – only a few feet. This fold will create a little pocket to make it easier to place your newborn inside the wrap.
- Follow steps 2-4 of the Basic Tie.
How To Place Baby In The Wrap Carrier (3+ months with head and neck control)
1. Look at the “X” pattern your wrap makes in front of you. One part of the “X” crosses over the other part of the “X.” Figure out which layer of the “X” is closer to your body, and which layer is further from your body. 
2. Making sure you have a firm grip on your baby, hold your baby against your chest using one arm. Holding your baby high up, over your shoulder, can make this step easier. Using your free arm, gently slide baby’s leg under the wrap layer that is closest to your body. 
3. Continuing to hold your baby carefully, shift your baby to the other shoulder, and repeat Step 2, sliding baby’s leg under the wrap layer that is further from your body. 
4. Spread each layer of the wrap apart under your baby’s bottom, pulling the fabric apart in order to spread your baby’s legs apart. Make sure the baby’s legs aren’t dangling straight down – baby should be in a seated, straddle position.
5. Pull one of the baby’s legs through the part of the wrap with the Keababies logo, making sure you hold the baby’s bottom to avoid falls. 
6. Pull the other leg through the part of the wrap with the Keababies logo. 
7. Pull the Keababies logo layer, the outer layer, up and over your baby’s back to his shoulders. You can also pull this layer over the baby’s head for a more snug position – this is great if baby needs to take a nap or even breastfeed!
How To Place Baby In The Wrap Carrier For Newborn Hug Hold (0-3 months)
-
Look at the “X” pattern your wrap makes in front of you. One part of the “X” crosses over the other part of the “X.” Figure out which layer of the “X” is closer to your body, and which layer is further from your body.
-
Making sure you have a firm grip on your baby, hold your baby against your chest using one arm. Using your free arm, gently slide baby into the “pocket” of the wrap layer that is closest to your body.
-
Continuing to hold your baby carefully, shift your baby to the other shoulder, and repeat Step 2, sliding baby into the “pocket” of the wrap layer that is further from your body.
-
Pull the fabric around your newborn’s back, making sure he is firmly cradled against your body.
-
Find the part of the wrap with the Keababies logo, and pull it up and over baby’s bottom, all the way up baby’s back, neck, and head, to hold the baby safely and firmly against your chest.
How To Place Baby In The Wrap Carrier For Front-Facing Carry (6+ months)
-
Look at the “X” pattern your wrap makes in front of you. One part of the “X” crosses over the other part of the “X.” Figure out which layer of the “X” is closer to your body, and which layer is further from your body.
-
Making sure you have a firm grip on your baby, hold your baby facing outward with one arm holding his body against you. Gently slide baby’s leg under the wrap layer that is closest to your body.
-
Continuing to hold your baby carefully, shift your baby and repeat Step 2, sliding baby’s other leg under the wrap layer that is further from your body.
-
Spread each layer of the wrap apart under your baby’s bottom, pulling the fabric apart in order to spread your baby’s legs apart. Make sure the baby’s legs aren’t dangling straight down. You may need to spend a few minutes adjusting the fabric to ensure a firm hold.
-
Pull one of the baby’s legs through the part of the wrap with the Keababies logo.
-
Pull the other leg through the part of the wrap with the Keababies logo.
-
Pull the Keababies logo layer, the outer layer, up and over your baby’s stomach and chest to his shoulders.
-
At this point you, you can continue to adjust the fabric as needed to make sure your baby is safe and secure. Make sure to only use this position for older babies who have strong control of their bodies!
It can be wonderful to wear your baby in a wrap carrier, but make sure you S.T.I.C.K. to these safety guidelines!
S: Baby should have a supported back by using the fabric to support him at all times.
T: Baby should be wrapped tightly against your body to avoid falling out of position.
I: Baby should be in view at all times.
C: Baby’s chin should never be squished against his chest.
K: Baby should always be close enough to kiss, not too low on your body.
Get your very own KeaBabies Wrap Carrier now! All you got to do is to click HERE.
Be Part of our KeaCommunity! Follow us on Instagram @keababies and join our Facebook Group KeaBabies Love and be part of our loving and supportive KeaBabies Community!
Parenting is Awesome. Sleep is Overrated. Every day is an Adventure.

